




Generate 3D
Generate 3D is the main one-click building command for a prepared 2D floor plan. It runs the full wall, join, opening, and model-generation pipeline after the plan has been scaled, mapped, cleaned, and checked.
For the complete DWG/DXF preparation sequence, follow the Import 2D to 3D tutorial before the first generation run.
- Verify a known CAD dimension and source units.
- Map required layers to LizArk roles.
- Preview duplicates, overlaps, and gaps.
- Run Preflight and review its report.
- Save settings, then click Generate 3D.
To Elevation
To Elevation is a separate conversion workflow for prepared plan geometry that needs level or elevation remapping. It is not the label of the normal one-click building command.
Use Generate 3D for the standard full-plan build. Use To Elevation only when the project specifically needs its elevation-oriented remapping workflow.
Detect Floors in To Elevation
Floor detection now lives inside To Elevation rather than as a separate toolbar command. Detect Floors performs an explicit rescan of the selected plan or the active model and refreshes elevation-level markers.
Use it before applying the To Elevation conversion when copied or edited plans may contain stale level metadata.
Incremental Rebuild
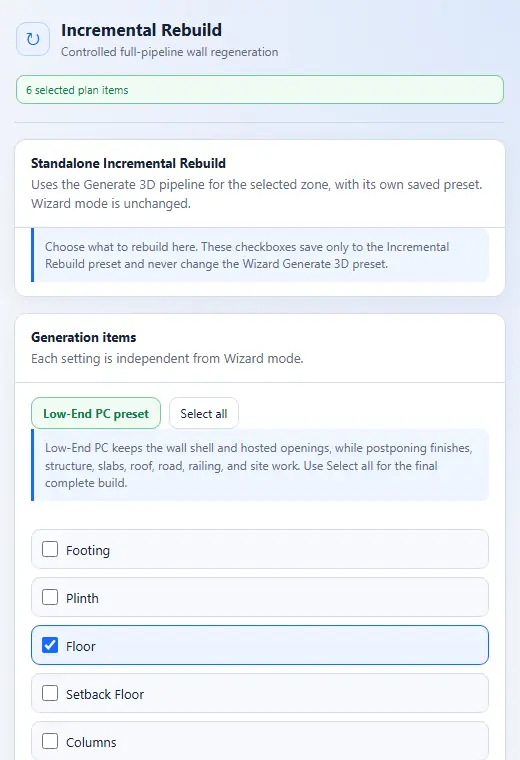
Incremental Rebuild opens a dedicated wizard that lets you choose the rebuild scope, then regenerates the edited zone instead of requiring a full-model rebuild for every local correction.
Select the changed 2D area before starting. The tool includes a preflight step and reports the affected walls and openings when the rebuild completes.
Finish Brush
Finish Brush lets you hover a valid wall or structural surface and click to apply plaster or paint. P cycles apply and remove modes, I switches between interior and exterior, and Ctrl plus click temporarily removes the finish under the cursor.
Plaster creates a measured finish shell that preserves door and window openings. Paint remains a separate zero-thickness material layer. Each layer stores its finish type, side, material, opacity, and other settings with the source model object, so it can be refreshed or removed later.
This is BIM-like behavior inside SketchUp because the finish carries editable intent and a relationship to the building object. It does not turn SketchUp into a full BIM authoring platform.
- Apply or remove interior and exterior plaster independently.
- Apply paint to the plaster shell when one exists, or to the source face when it does not.
- Connected finishable surfaces can be expanded from the picked face.
- Automatic refresh can rebuild stale plaster after source geometry changes when enabled in Settings.
- Removing paint restores the plaster material beneath it where applicable.
CAD Import and preflight
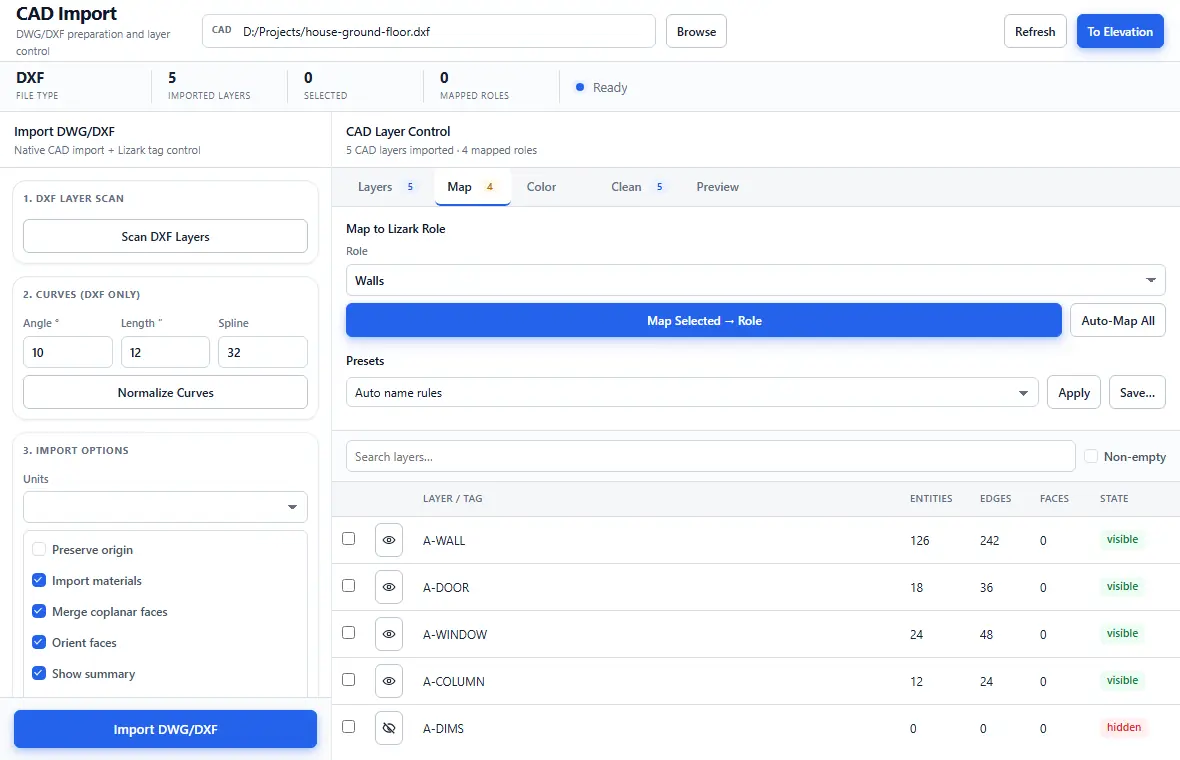
CAD Import is a dedicated DWG/DXF command, separate from PDF or image import. It supports native units and import options, DXF layer scanning and filtering, curve normalization, post-import visibility and locking, automatic or manual role mapping, reusable mapping presets, and geometry cleanup.
Use preview-first cleanup: inspect duplicate edges, overlaps, and gaps before removing or repairing geometry. The Preview tab also reports unmapped and empty layers and shows a readiness checklist.
Run Preflight before a major generation or rebuild. Safe automatic fixes are available, but review any change that may alter authored CAD geometry.
- DWG layers can be selected after import; DXF supports pre-import layer filtering.
- Auto-Map uses layer names and must still be reviewed.
- Flatten Groups, Orthogonal Copy, duplicate removal, overlap checks, and gap repair are separate deliberate actions.
- PDF or image plans should be scaled, locked, and traced unless usable vector linework has been prepared.