

Start with the Settings panel before the first build: choose the project region and units, confirm wall and opening defaults, then save the configuration before running Wizard, DWG, PDF, or Trace workflows. The screenshots below are captured from LizArk's shipped HTML dialogs at their SketchUp dialog dimensions, so the controls and labels match the current source.
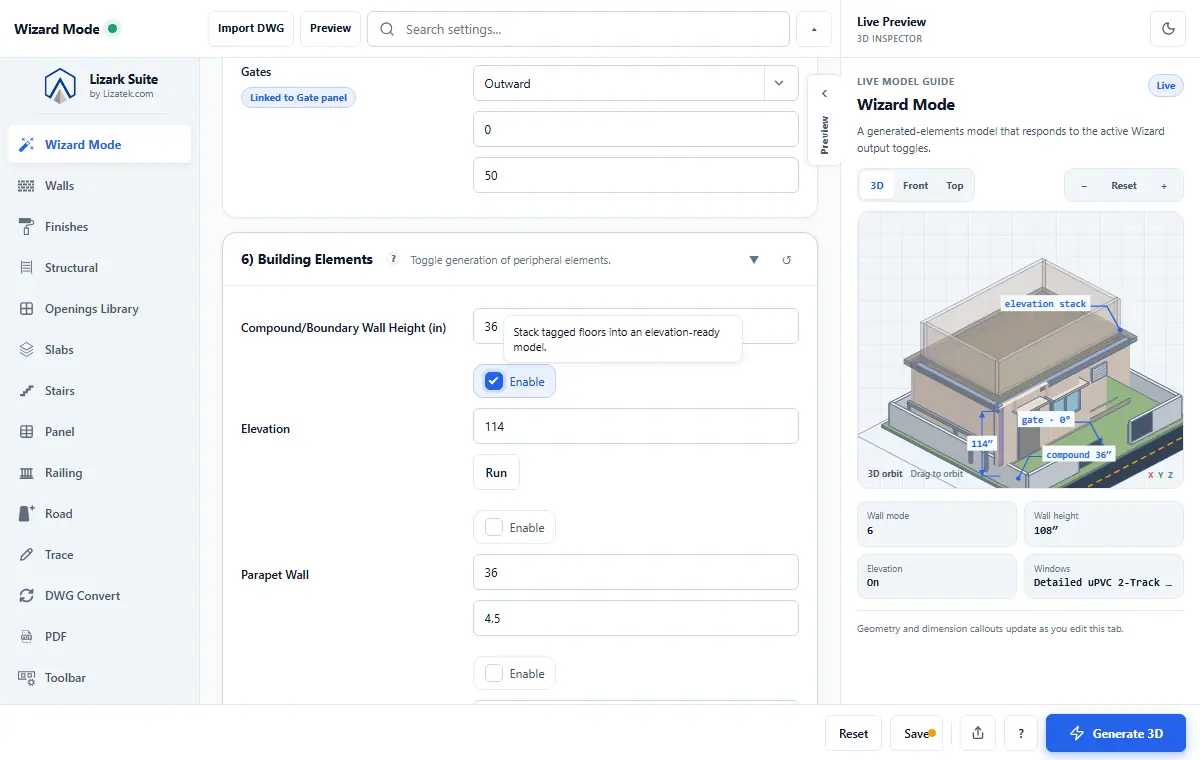
Global controls & shortcuts
The header contains quick actions that stay available no matter which tab is open. Import DWG jumps straight to the DWG Convert tab, Preview writes the current settings back to SketchUp, and Search lets you find any setting by name. The collapse-all button expands or collapses every card at once, and the theme toggle switches between light and dark UI.
At the bottom of the dialog you will find Reset, Save, and Generate 3D actions. Reset reverts to defaults, Save writes the current configuration to SketchUp, and Generate 3D runs the main 2D → 3D conversion. Export and Import clipboard let you copy settings as JSON to share between projects or machines.
- Import DWG - jump to DWG Convert tab.
- Preview - save current settings to SketchUp.
- Search - type a setting name; matches are highlighted with a count.
- Collapse all - expand/collapse every card in the current tab.
- Theme toggle - switch between light and dark UI.
- Reset - revert to factory defaults.
- Save - write settings to SketchUp (Ctrl+S).
- Export / Import clipboard - copy or paste settings as JSON.
- Generate 3D - run the main 2D → 3D conversion.
Wizard Mode
Wizard Mode is the fastest way to configure the most common 2D plan-to-3D conversion path. Use it when you want to set one default wall thickness, one road type, one opening style, and a list of building elements in one place, then hit a single Convert button to generate the full model.
- Wall Detection: Auto Detect, 6 in or 9 in default wall thickness.
- Multi Wall: use a saved multi-layer wall assembly for Wizard conversions.
- Road Type: Current Settings, Residential, Main Road, Service Road, or Custom.
- Junction Mode: Center or End.
- Road Source: Selected Edges, Selection or CAD Layer, or CAD Layer Only.
- Road Tag and CAD Layer Name for grouping and layer naming.
- Openings Selection: choose default styles for windows, ventilators, doors, and gates.
- Building Elements: toggle compound wall, elevation, parapet wall, and plinth beam with dimensions.
- Generate Elements: per-category toggles for Foundation, Structure, Openings, and Extras, plus Only / All / None buttons.
- Delete floor plan after generation option.
- Convert 2D → 3D (Wizard) button runs the full Wizard.
Walls
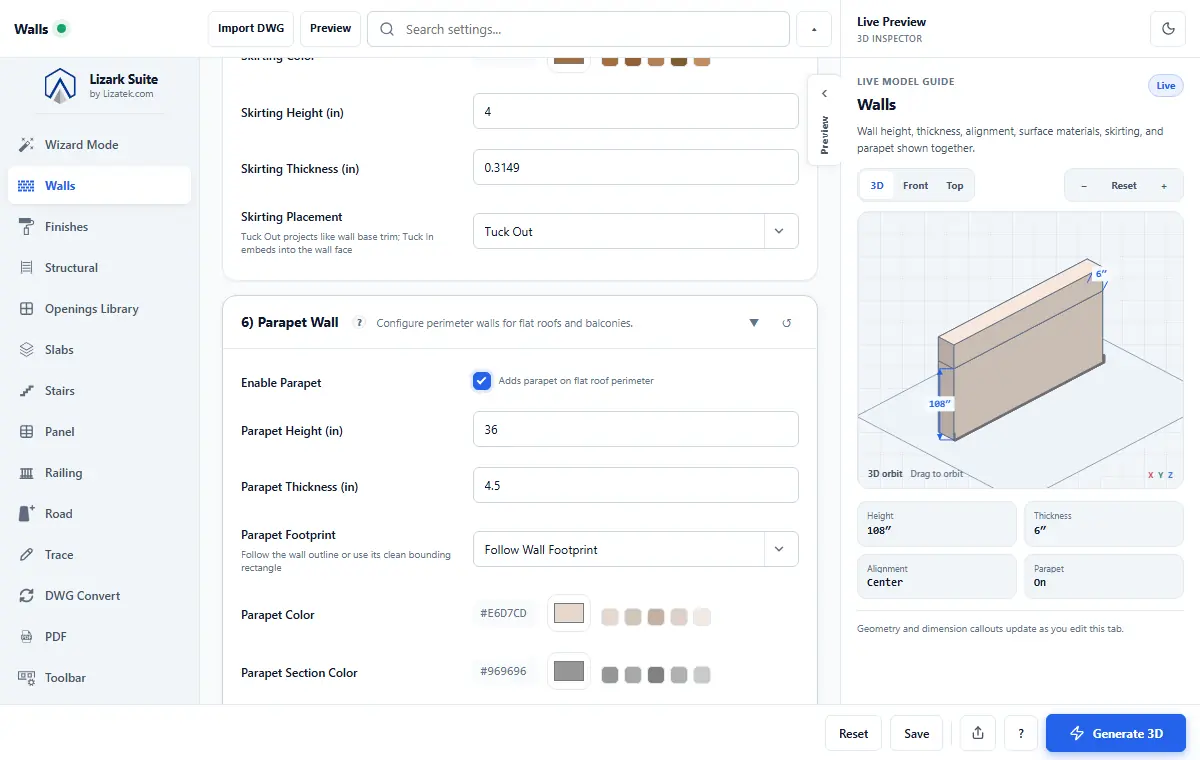
The Walls tab configures wall dimensions, detection tolerances, default openings created while drawing jumps, and materials for outer, interior, section, skirting, parapet, and compound walls. Set these values before importing a DWG or PDF so that line detection matches your project.
- Wall Height, Min/Max Thickness, Default Thickness.
- Draw Wall Thickness and Draw Wall Height for interactive wall drawing.
- Wizard Multi Wall toggle and Open Settings button.
- Wall Alignment: center, inside, or outside the detected line.
- Overlap Threshold and Gap Max control how wall lines are paired as double-leaf or single-leaf walls.
- Draw Wall Jump Openings: place an opening component automatically when you draw a J, W, or V jump.
- Jump defaults: Door Jump, Window Jump, Ventilator Jump.
- Colors and textures for Outer, Interior, Section, and Skirting faces.
- Skirting Height, Thickness, Placement (Tuck Out / Tuck In).
- Parapet Wall enable, height, thickness, colors, texture.
- Compound Wall height, thickness, colors, texture.
Finishes
Finishes manages plaster and paint as separate, editable layers instead of treating every surface change as a one-off material edit. Use it for interior or exterior finish intent on walls, columns, beams, slabs, and plinth beams.
The finish stack is stored with LizArk model data. This creates a BIM-like workflow inside SketchUp: the source object, finish type, side, thickness, material, and visibility remain identifiable and can be updated or removed later. LizArk is still a SketchUp extension, not a full BIM authoring platform.
- Interior and exterior plaster toggles with thickness, gypsum, cement, POP, lime, or custom material choices.
- Smooth, medium, rough, sand, or custom plaster textures, plus color and opacity.
- Left, right, or both-side application with inner, outer, or center offset modes.
- Square, chamfer, or round corners and return, stop, or wrap treatments at openings.
- Preserve Openings cuts finish shells around doors and windows.
- Paint stays non-destructive and can target SketchUp, V-Ray, Enscape, Twinmotion, Lumion, Thea, Corona, or a custom material workflow.
- Apply or remove plaster and paint independently from the Actions card.
Structural
Structural controls the geometry and appearance of columns, beams, and foundation footings. The values feed both generated structure and the dedicated Structural Multi Tool for manual BIM-like placement.
- Column Height.
- Pedestal enable/disable, height, width, depth, and pedestal color.
- Column Color and optional Column Texture.
- Beam Bottom Height (Z), Width, Height/Depth, and Beam Color.
- Footings enable toggle; type Strip, Spread, or Pad.
- Footing Width, Depth/Thickness, Trench Depth, Offset.
- Footing Color.
Openings Library
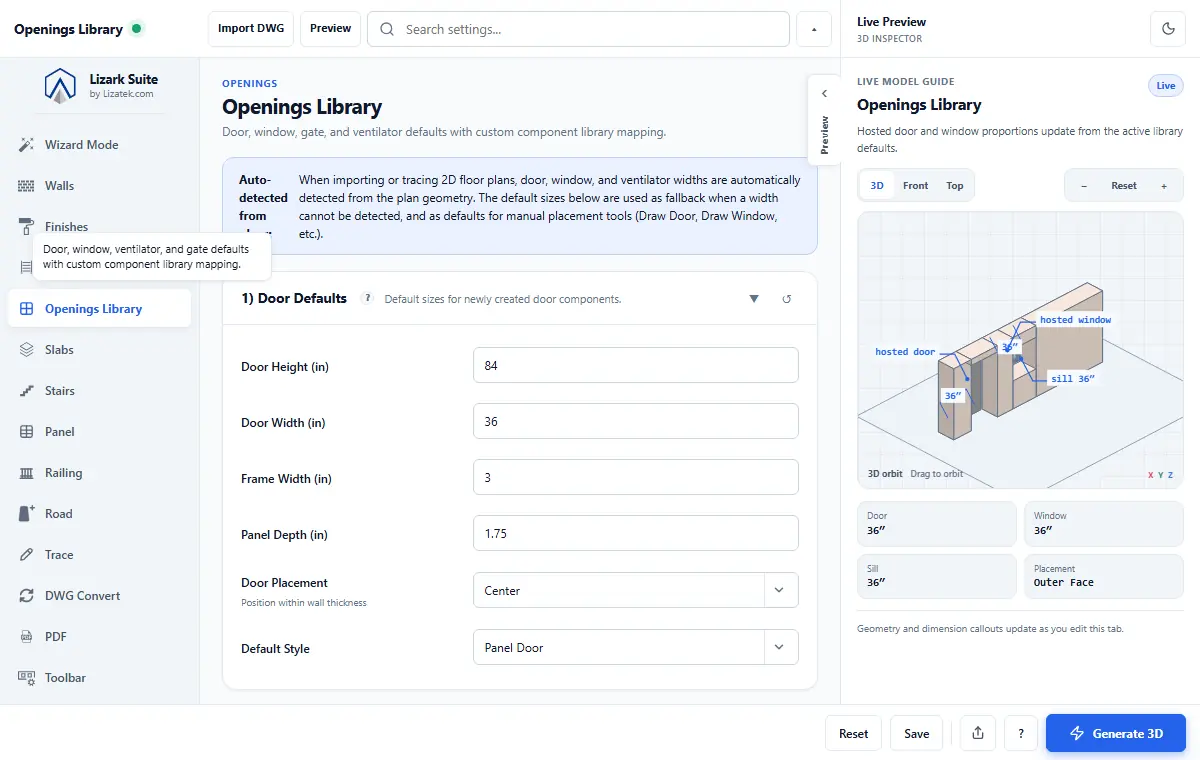
The Openings tab sets default dimensions, placement, and styles for doors, windows, gates, and ventilators. Once saved, every generated opening uses these defaults unless you override it later.
- Door defaults: height, width, frame width, panel depth, placement, style.
- Window defaults: sill height, height, width, frame width, glass thickness, placement, style.
- Glue + Cut Opening toggle for clean wall subtraction.
- Gate defaults: height, width, frame width, panel depth, style, placement, operation, swing direction, open angle, slide-open percentage.
- Ventilator defaults: height, width, sill height, top offset.
Slabs
Slabs manages floor, roof, setback, plot/site, and boundary slab geometry. It also controls roof pitch, overhang, and plot-boundary text.
- Floor Thickness, Plot/Site Thickness, Roof Thickness.
- Setback Floor enable and Extend Roof Over Setback.
- Colors and textures for Floor, Setback Floor, and Plot Surface.
- Plot Boundary thickness, color, and texture; Raised Text thickness, color, and texture.
- Roof Type: Flat, Pitched/Gable, Hip, or US Standard.
- Pitch, Overhang, Ridge Direction: auto, X, or Y axis.
- Roof color and texture.
Stairs
The Stairs tab sets default geometry, style, code compliance, and materials for automatic stair generation. These values are used by the stair generator and the Auto Stair Direction tool.
- Stair Type: Dog-Legged, Straight, or Straight Along Path.
- Width, Tread Depth, Riser Height, Flight Height, Waist Thickness.
- Max Riser, Min Tread.
- Tread type flat/sloped; Riser type open/closed; nosing toggle and depth.
- Auto Height From Roof with roof clearance.
- AI Auto Tread and Strict Auto-Stair Code Check.
- Landing After Steps and landing/turn geometry controls.
- Dog-leg, L-shape, and spiral turn directions; spiral post diameter.
- Stair Colors: base, tread, riser, waist.
Panel
Panel configures parametric window and door panels. Use it to fine-tune sash, glass, frame depth, and divided-light layouts before generation.
- Panel defaults: width, height, sill offset.
- Construction: sash thickness, glass thickness, pane spacing, frame depth, pane inset.
- Rows and Columns for divided-light muntin layouts.
- Panel Type: Fixed, Casement, or Sliding.
- Panel Colors: sash color, glass color.
Railing
The Railing tab sets default geometry, baluster style, and materials for railings generated by LizArk tools.
- Railing Height, Post Spacing, Post Width/Depth, Top Rail Width/Height.
- Baluster Style: Picket, Glass, or Cable.
- Baluster Width/Spacing.
- Glass Thickness (for glass style).
- Cable Count (for cable style).
- Post Color.
Trace
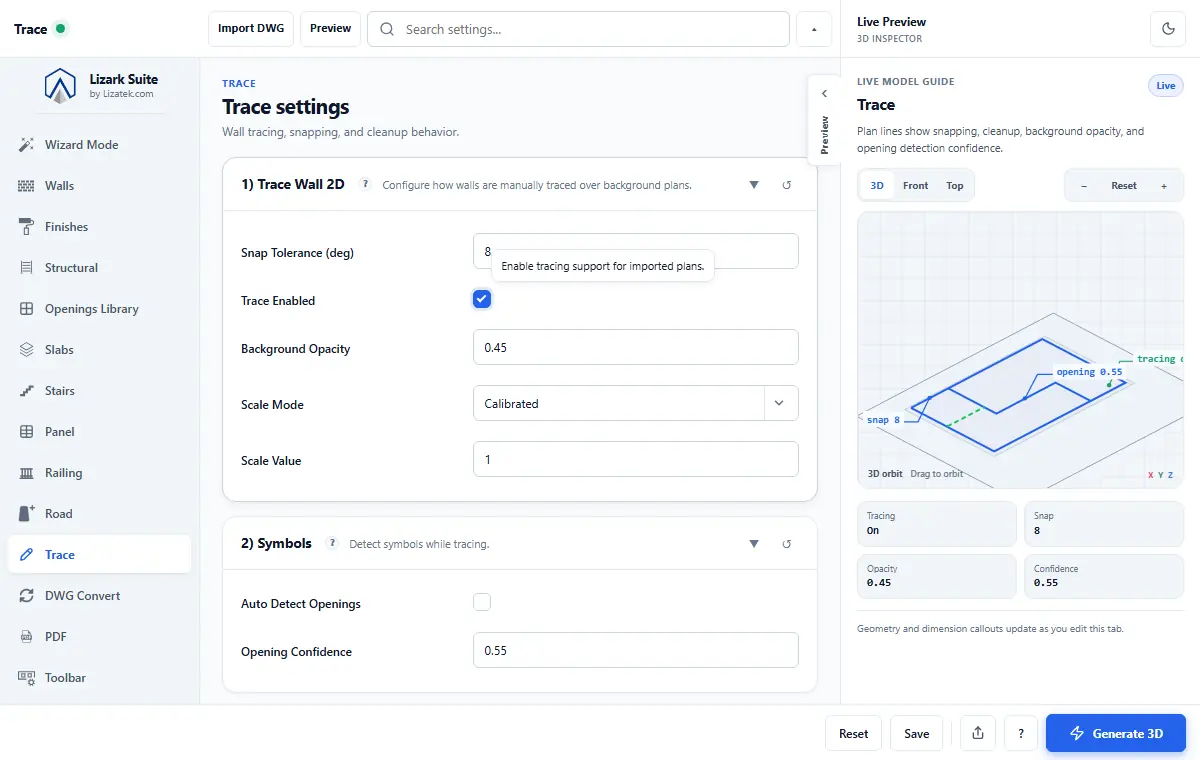
Trace controls how the Web Draw Wall or plan-tracing canvas behaves: snap tolerance, background opacity, scale calibration, and automatic opening detection.
- Trace Wall 2D Snap Tolerance in degrees.
- Trace Enabled toggle.
- Background Opacity for the imported plan.
- Scale Mode: Calibrated or Manual.
- Scale Value for manual mode.
- Auto Detect Openings toggle and Opening Confidence threshold.
DWG Convert
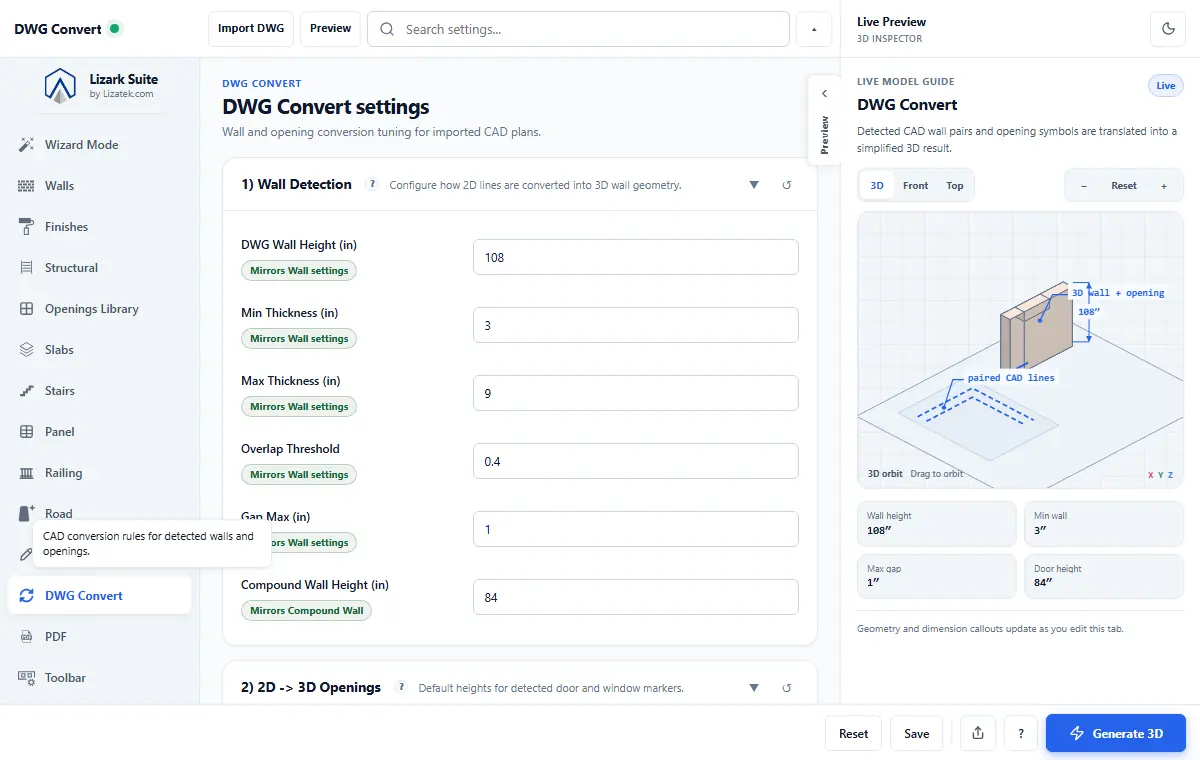
DWG Convert is the hub for importing CAD files, tuning wall detection, mapping custom SKP components to markers, and running the 2D → 3D conversion on imported DWG geometry. Set your tolerances here before pressing Convert 2D → 3D (DWG).
- DWG Wall Detection: wall height, min/max thickness, overlap threshold, gap max, compound wall height.
- 2D → 3D Openings defaults: door, gate, window sill, and window top heights.
- Chejja / Chajja (sun shade) generation: design type, projection, side extension, thickness, lintel offset/clearance, slope drop, front drop, color.
- Custom SKP Mapping: enable and browse your own SKP components for markers D, D1, G, G1, W, W1, V, V1.
- Advanced JSON map for extra marker codes.
- Convert 2D → 3D (DWG) button.
The PDF tab controls PDF import scaling, layer naming, vector extraction, and how the imported page is placed into the SketchUp model.
- Target layer/tag and generated layer prefix.
- Auto Scale on Import and Auto-fit Width.
- Default Custom Scale.
- Lock Layer After Import.
- Vector Import Mode to extract editable lines.
- Vector Page Number and Curve Segments.
- Import PDF With Preview button.
Toolbar
Toolbar lets you choose which LizArk toolbars are visible and reorder tools between Main Toolbar, Trace & Utils, and Hidden Tools. Changes typically require a SketchUp restart.
- Show Main Toolbar.
- Show Trace & Utils Toolbar.
- Drag-and-drop lists for Main Toolbar, Trace & Utils, and Hidden Tools.
- Eye icon on each tool to quickly show/hide.
Stats
Stats displays live counters from your project and the last generation run. Use it to sanity-check model size and estimate basic material quantities.
- Generation counts: 3D generations, PDF imports, To Elevation runs, incremental rebuilds, total successful runs.
- Floor metrics: floors, floor labels, total floor area, split count.
- Object counts: walls, compound/multi walls, doors, gates, windows, ventilators, chejjas, roofs/site slabs, stairs/skirting, beams/columns, generated objects.
- Last run: duration, preflight result, wall length, wall surface area, slab area, opening area, last failure.
- Scan Current Model and Reset Stats actions.
License
The License tab is where you manage activation, view subscription status, check usage limits, and open the customer portal. Keep a copy of your license key outside SketchUp.
- Plan name, status pill, and days remaining.
- License key, customer email, Polar status, last verified time.
- Manage License, Buy / Get Key, Customer Portal, Refresh Status, Release Key buttons.
- Usage limits: 3D generations and PDF imports with progress bars.
- Version, support email, activation label, expiry date, next online check, offline valid-until date.
AI / MCP — v1.0.27
The AI / MCP tab connects a compatible AI app to Lizark through a local bridge on your computer. AI / MCP settings are included in the current v1.0.27 download. Node.js and the Lizark MCP companion must be installed separately.
MCP preferences have their own Apply MCP settings button. Ordinary Save, Generate 3D, and settings import do not apply MCP access changes. Test bridge checks local Lizark observation; it does not prove that your AI app is connected.
- Open Lizark Settings and select AI / MCP. Enable MCP to start the local bridge; the choice persists across SketchUp sessions.
- Turn Allow model changes off for inspection-only access. When changes are allowed, model-changing calls still require confirmation, a current model identity, and existing Lizark license checks.
- Enter node if Node.js is on PATH, or enter the full Node.js executable path.
- Use Browse to select your installed lizark-server.mjs companion, then click Apply MCP settings.
- Click Copy connection configuration and add it to your AI app's MCP configuration.
- Keep SketchUp open. Use Test bridge for a local check, then call lizark_status from the AI app to confirm the connection.
- Keep AI-provider API keys in your AI app. The copied configuration contains the command and companion path, without the local session token.
- Interactive tool activation selects a tool; complete placement in SketchUp and inspect the result before treating geometry as finished.
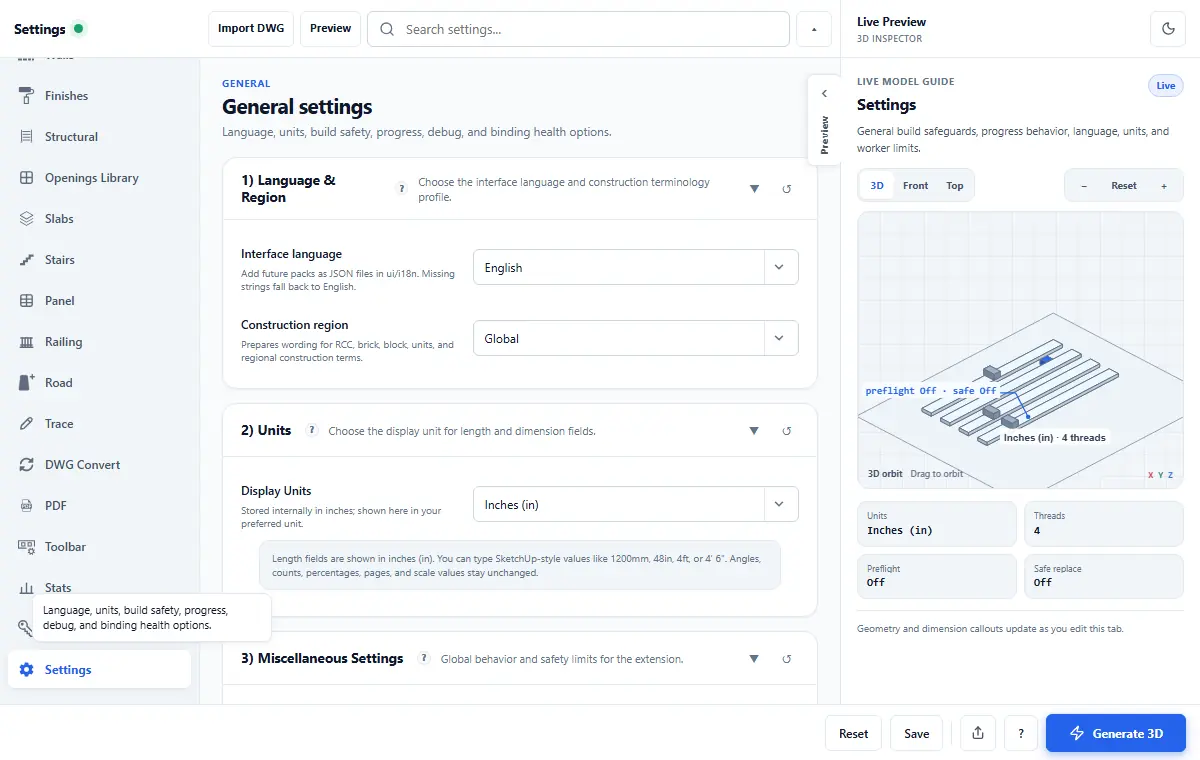
General Settings
General Settings is the global preferences tab. Configure language, region profile, units, build safety, progress UI, and debugging options here. Setting the region profile once per project helps the Wizard apply the right defaults for local construction practices.
- Language and Region Profile: Global, India RCC + masonry, GCC RCC + blockwork, Southeast Asia, Latin America, Europe.
- Display Units: inches, feet, millimetres, centimetres, metres; accepts SketchUp-style input such as 1200mm, 48in, 4ft, or 4 ft 6 in.
- Auto-Save on Build.
- Max Build Threads.
- Preflight Check.
- Safe Replace.
- Progress UI.
- Suppress Popups.
- Debug Logging.
- Settings Health indicators for the SketchUp bridge, config source, last save, and binding audit.
