
US framing tutorial · Doors
Door Rough Openings in SketchUp with Lizark
A door rough opening in SketchUp should be coordinated with the door unit and its host wall. Lizark can place supported native doors in US assembly walls and create their linked framed openings. That makes the doorway easier to review than a door component placed over an uncut wall.
Follow along with numbered screenshots
Work in a separate practice model. These examples use Lizark 1.0.28 in SketchUp 2026. Read each action, enter the stated values, and check the result before continuing. Open any screenshot for a full-size view.
-
Step 1 · Choose the US wood profile
Open Lizark Settings → US Framing. Set Country to United States, choose Wood light-frame and check Enable US framing. For this exercise, use the 2x6 lap siding exterior assembly and a 108 in wall height. Scroll down and click Apply US framing before opening an assembly tool.
Screenshot 1 / 4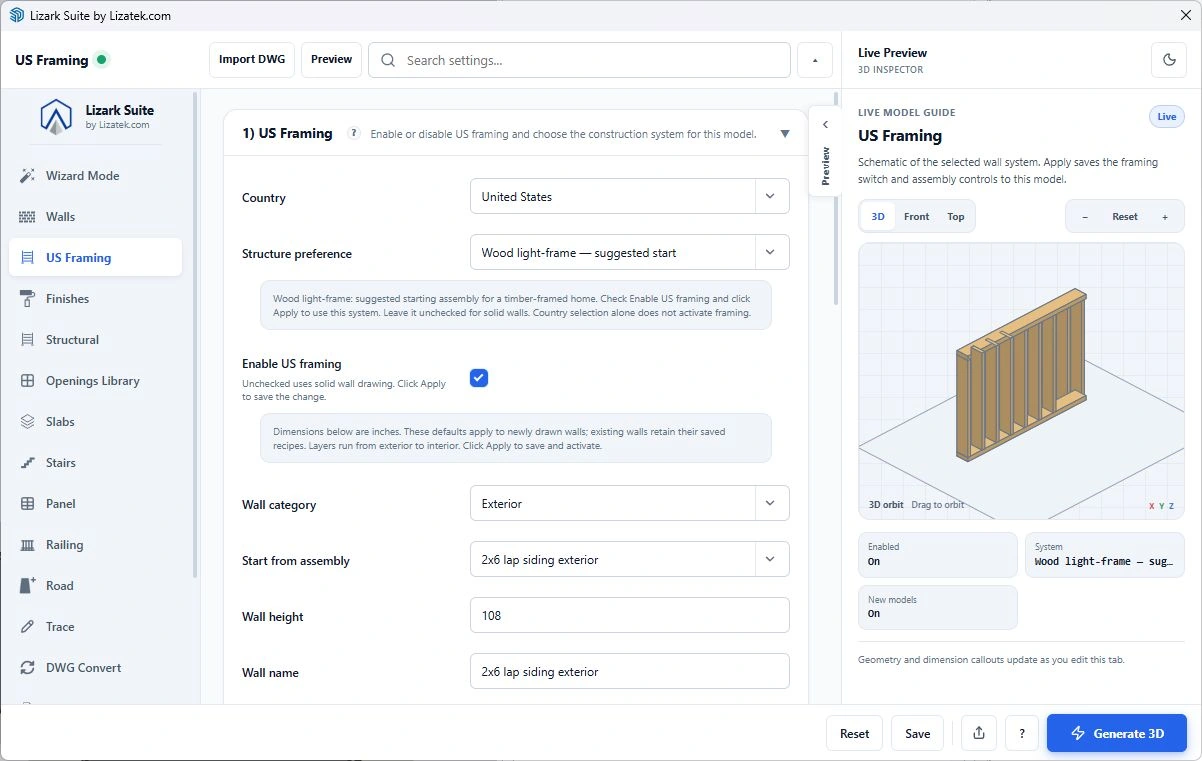
Fresh live Lizark configuration screen in SketchUp 2026. Open the image to read the controls at full size. View full size Checkpoint: The saved profile reports United States / Wood light-frame. A checked box or schematic alone does not mean the profile has been applied.
-
Step 2 · Choose the US Shaker door preset
Create the host wall first and keep its normal finish layers visible. Open Add Door and select US Shaker 2-Panel. Review the preview before changing dimensions. This preset establishes the example appearance; it does not specify a real product’s rough opening.
Screenshot 2 / 4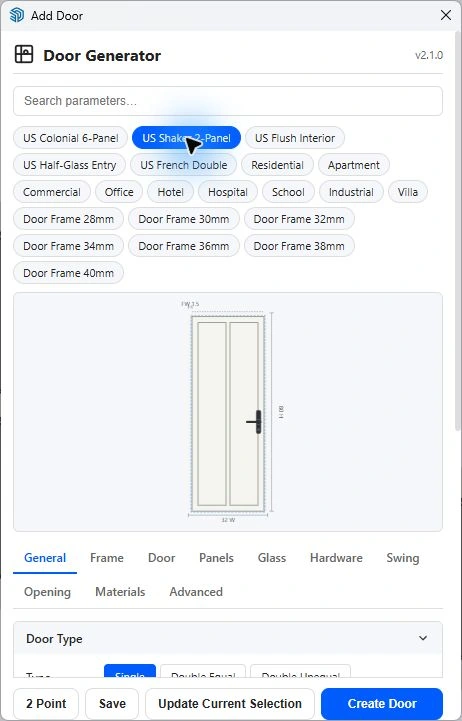
Fresh live Lizark configuration screen in SketchUp 2026. Open the image to read the controls at full size. View full size Checkpoint: US Shaker 2-Panel is highlighted and the preview shows the two-panel door.
-
Step 3 · Set dimensions, handing and placement
In General, use Single, width 32 in, height 80 in and thickness 1.375 in. Choose Closed, Left Hand and Inward for this demonstration. Review Frame and Opening settings for your host. Keep single-point placement when the configured width should control the unit; the 2 Point button switches placement modes. Click Create Door and pick the broad finished face of the US wall.
Example inputs for step 3 Units in Width / height 32 / 80 Thickness 1.375 State / handing / direction Closed / Left Hand / Inward Screenshot 3 / 4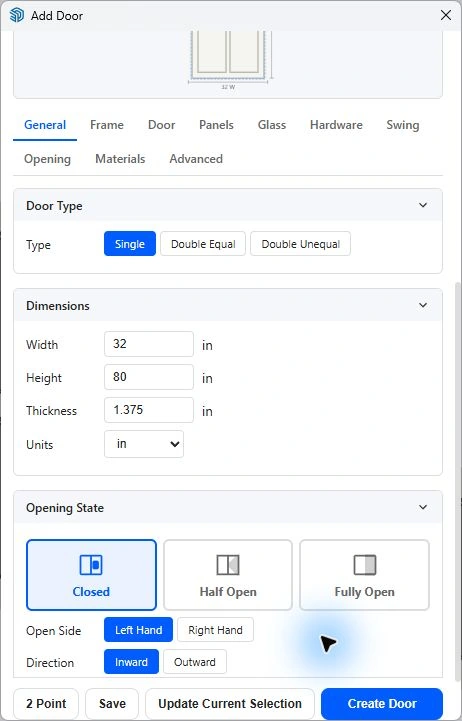
Fresh live Lizark configuration screen in SketchUp 2026. Open the image to read the controls at full size. View full size Checkpoint: The unit uses the entered dimensions and belongs to the intended wall. Keep product rough-opening requirements separate from the nominal unit size.
-
Step 4 · Inspect the linked opening
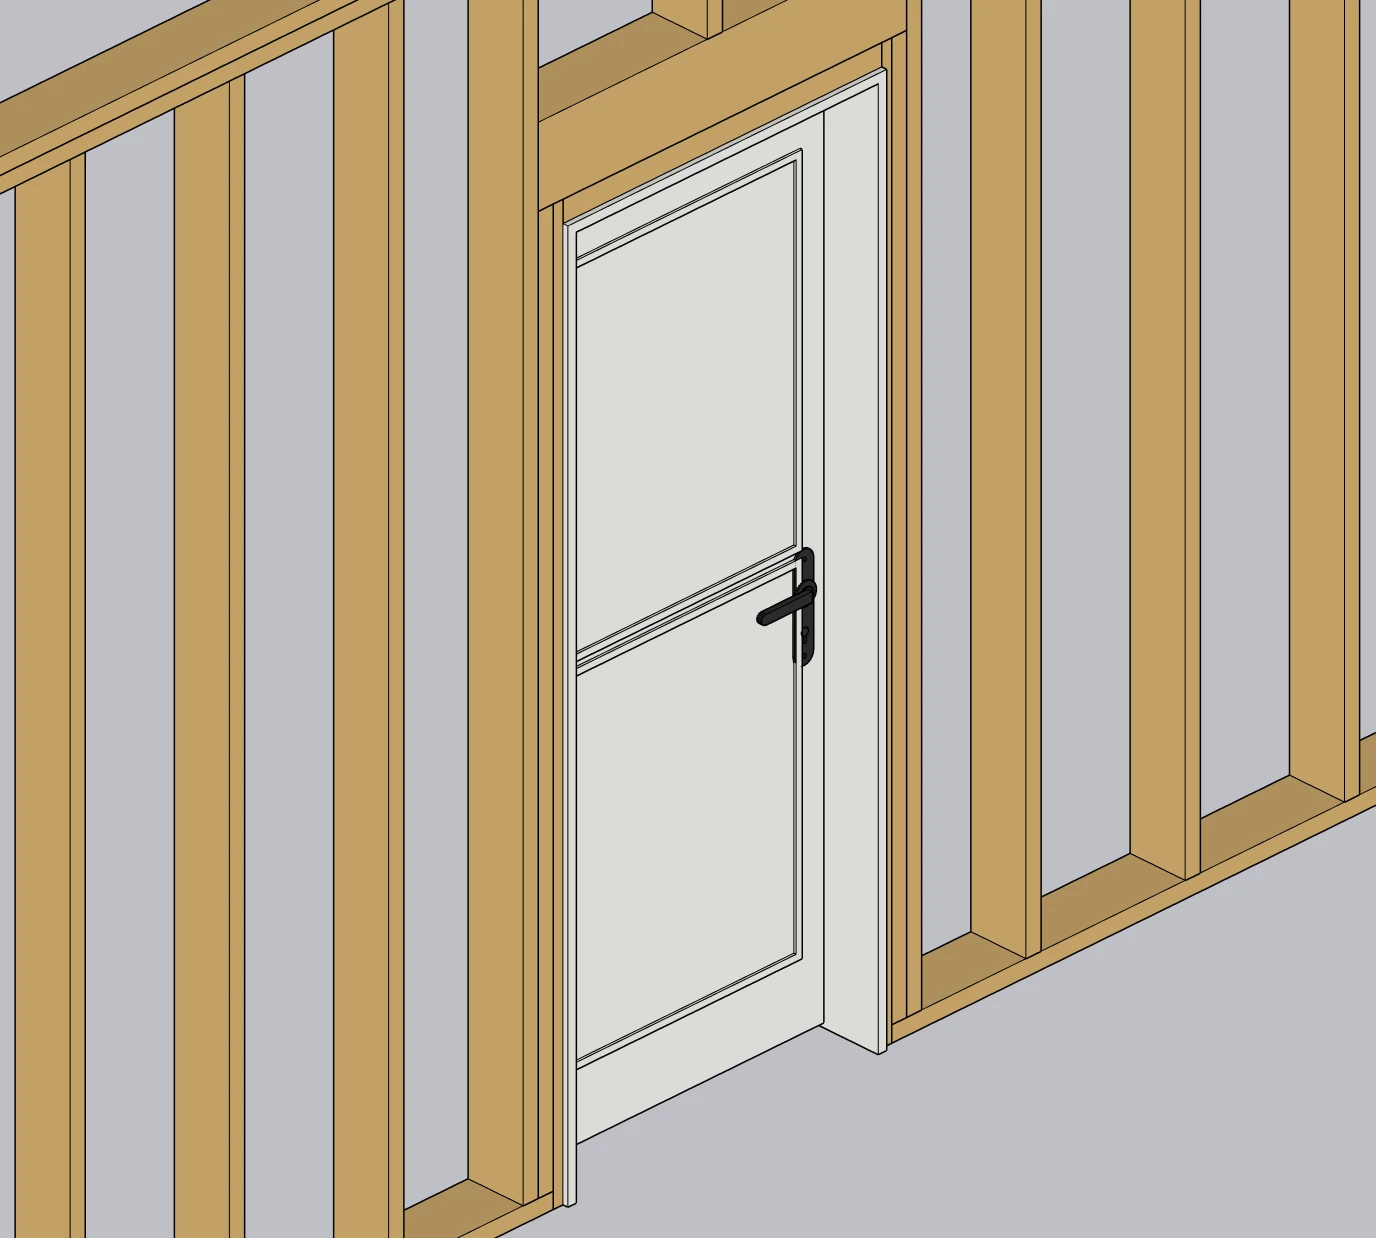
Return to Select and expose the structural core of the host wall. Inspect the cut down to the floor, the framing at each side and the region above the door. Restore finishes and compare the other side of the wall. Review the door swing in plan before repeating it.
Screenshot 4 / 4Fresh live SketchUp result: the Shaker door and its surrounding wall framing. This is a model coordination view. View full size Checkpoint: The opening passes through the host assembly and the door sits at the intended floor elevation.
Separate the door size from the rough opening
A nominal door size is not a universal rough-opening dimension. The unit, frame, installation allowance and manufacturer instructions determine the opening needed for a real product. Keep those dimensions separate in your design notes and use the selected product documentation before preparing construction information.
For a US interior study, a Shaker, flush or Colonial preset can establish the appearance. The preset still needs review: width, height, frame depth, handing and swing must match the design. An entry door may also need a threshold, exterior trim and a different wall assembly from an interior partition.
Place on the supported wall face
Apply the US profile and create the assembly wall before adding the door. Restore normal layers so its broad wall face is available for placement, configure the door, then pick that face. Use single-point placement when the configured width should control the unit; use two-point placement deliberately when defining a span.
The host matters. A generic face-cutting SketchUp component can cut a face, but that alone does not describe a complete layered wall or the surrounding framing. Confirm that the opening is linked to the supported Lizark assembly and inspect the resulting cut from both sides.
Review the doorway in plan and framing views
Expose the structural core after placement. Check the header region, side framing and the opening down to the floor. A doorway that appears correct in elevation can still be on the wrong story or too close to a corner.
In plan, review the swing against cabinets, adjacent doors and circulation. For a remodel presentation, pair the finished view with the exposed framing view. This explains the proposed change without implying that the modeled header or connection has already been engineered.
Worked example: a 32-inch door in an addition
Suppose the design brief calls for a nominal 32 in by 80 in interior door. Enter the intended unit dimensions in the supported door controls, choose the appearance and review frame depth. Write the rough-opening requirement separately from the nominal label. The example dimensions identify the study door; they do not specify an installation allowance or a universal framed opening.
Create the host wall under the applied US profile, restore its normal layers and place the door on the broad face. Inspect the door at floor level, then expose the framing. Check the opening through the full assembly, the region above the door and the remaining wall at each side. Measure the actual model rather than assuming the preset name establishes all these relationships.
For a remodel, keep the existing doorway and proposed doorway in separately named options. Show how the new swing affects circulation, furniture and adjacent doors. A larger opening can change the space remaining for switches, cabinets and wall returns even when the door itself fits. Review those conditions with the finished wall depth visible.
Avoid three common doorway mistakes
The first mistake is using one measurement for the door leaf, complete unit and rough opening. A nominal product label is useful for conversation, but the manufacturer information must resolve the unit and installation dimensions. Keep those entries explicit in the opening schedule so the model is not used as an ordering instruction by accident.
The second mistake is placing from a structural floor reference without accounting for the finished floor. Compare the bottom of the opening with the final walking surface in section. The third is checking only the closed-door view. Inspect the swing, handing and clear space at the approach. A door may look correct in elevation while its open leaf conflicts with a stair landing or another door.
Prepare a useful door coordination package
Save a plan with the swing readable, an elevation with the opening dimensions, and a framing view with the host identified. Include the product family, handing, unit size, rough-opening source and wall depth in your notes. If the product has not been selected, mark the opening as a design assumption and identify which dimensions need confirmation. This lets the client compare options while keeping procurement decisions tied to the chosen product.
A practical Lizark workflow
- Create a supported US wall with visible finish faces.
- Choose a door preset and check unit dimensions and frame depth.
- Set handing, swing and the intended placement mode.
- Place the door on the broad side of its host assembly.
- Inspect the linked rough opening, floor elevation and swing.
What to check in the model
| Review | What to verify |
|---|---|
| Door unit | Product size and frame dimensions |
| Rough opening | Manufacturer requirement, not a guessed allowance |
| Host | Wall identity, depth and story |
| Swing | Handing, room clearance and nearby objects |
Frequently asked questions
Can I use the nominal door width as the rough-opening width?
Do not assume they are identical. Confirm the selected door unit and its installation requirements, then coordinate the model.
Why restore wall finishes before placement?
The native US assembly placement workflow expects a supported broad wall surface. Expose the framing after the door is placed.
Further reading
Product and industry references for the distinctions discussed in this guide:
