
For US residential designers & remodelers
US framing in SketchUp: model homes with Lizark
Show how a home comes together. Build wood walls, floor systems and roof framing as editable SketchUp geometry, then use the model to make design conversations more concrete.
Lizark’s US framing workflow brings wood, cold-formed steel, CLT and CMU modeling into SketchUp. Choose a construction profile, enter your dimensions, and generate supported walls, floors and roofs. For a residential addition, garage concept or custom-home study, that gives you a way to show structure alongside the architectural design.
Follow along: your first wood wall
Work in a separate practice model. These examples use Lizark 1.0.28 in SketchUp 2026. Read each action, enter the stated values, and check the result before continuing. Open any screenshot for a full-size view.
-
Step 1 · Choose the US wood profile
Open Lizark Settings → US Framing. Set Country to United States, choose Wood light-frame and check Enable US framing. For this exercise, use the 2x6 lap siding exterior assembly and a 108 in wall height. Scroll down and click Apply US framing before opening an assembly tool.
Screenshot 1 / 3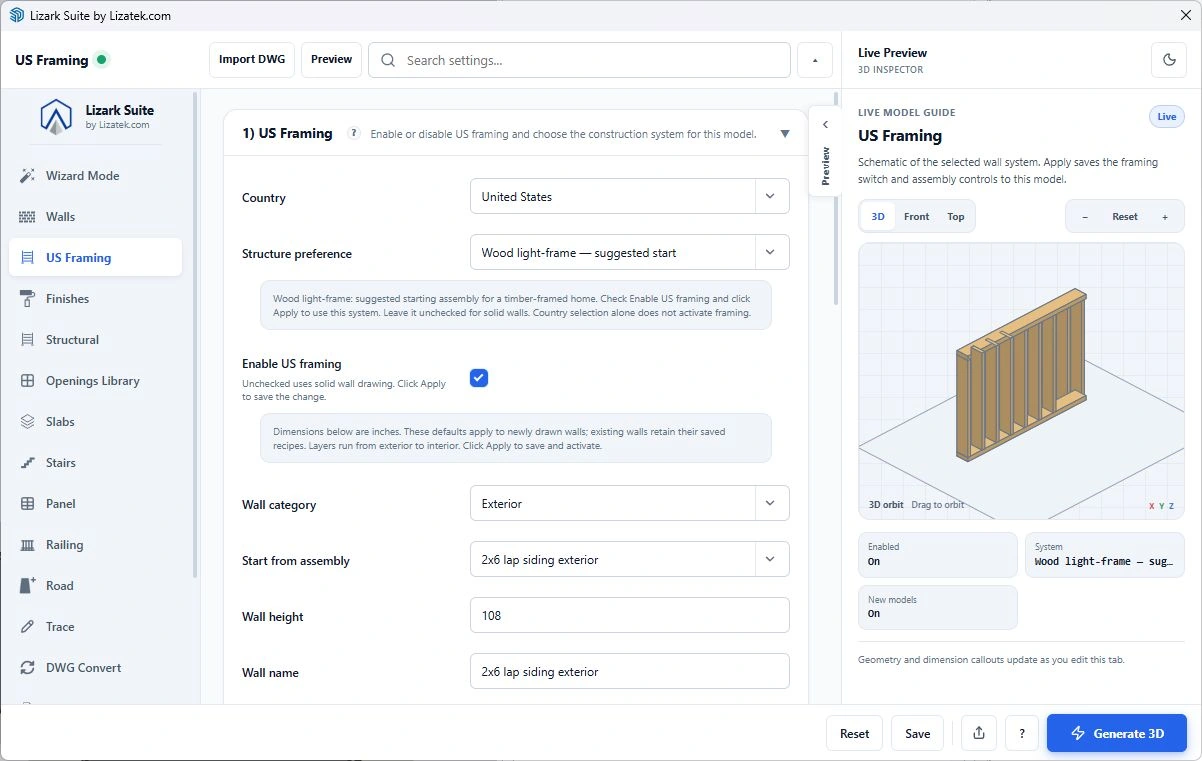
Fresh live Lizark configuration screen in SketchUp 2026. Open the image to read the controls at full size. View full size Checkpoint: The saved profile reports United States / Wood light-frame. A checked box or schematic alone does not mean the profile has been applied.
-
Step 2 · Review the layers and apply the assembly
Scroll to the bottom of US Framing. Review the cladding, sheathing, structural cavity and interior finish layers, then click Apply US framing. Also use for new models is optional: leave it unchecked if this exercise should affect only the current model. Close Settings after the saved-profile message appears.
Screenshot 2 / 3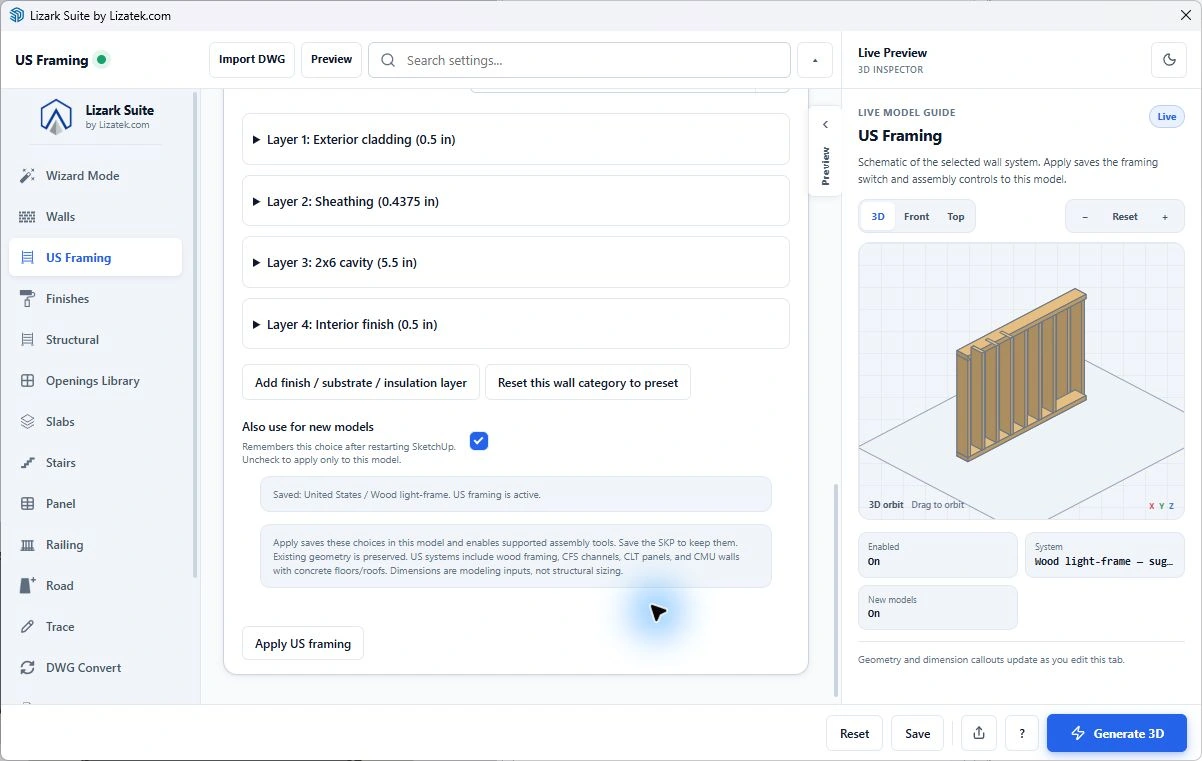
Fresh live Lizark configuration screen in SketchUp 2026. Open the image to read the controls at full size. View full size Checkpoint: The complete assembly depth includes the finishes. Confirm the saved-profile message before drawing the wall.
-
Step 3 · Draw the wall and inspect its framing
Activate Draw Wall, establish the first point on your intended floor plane and define a 20 ft wall along the chosen reference. Keep finishes visible when adding a door or window. After placement, select the assembly and use Lizark US view → Show structural core. The door and window guides below show their configuration steps.
Screenshot 3 / 3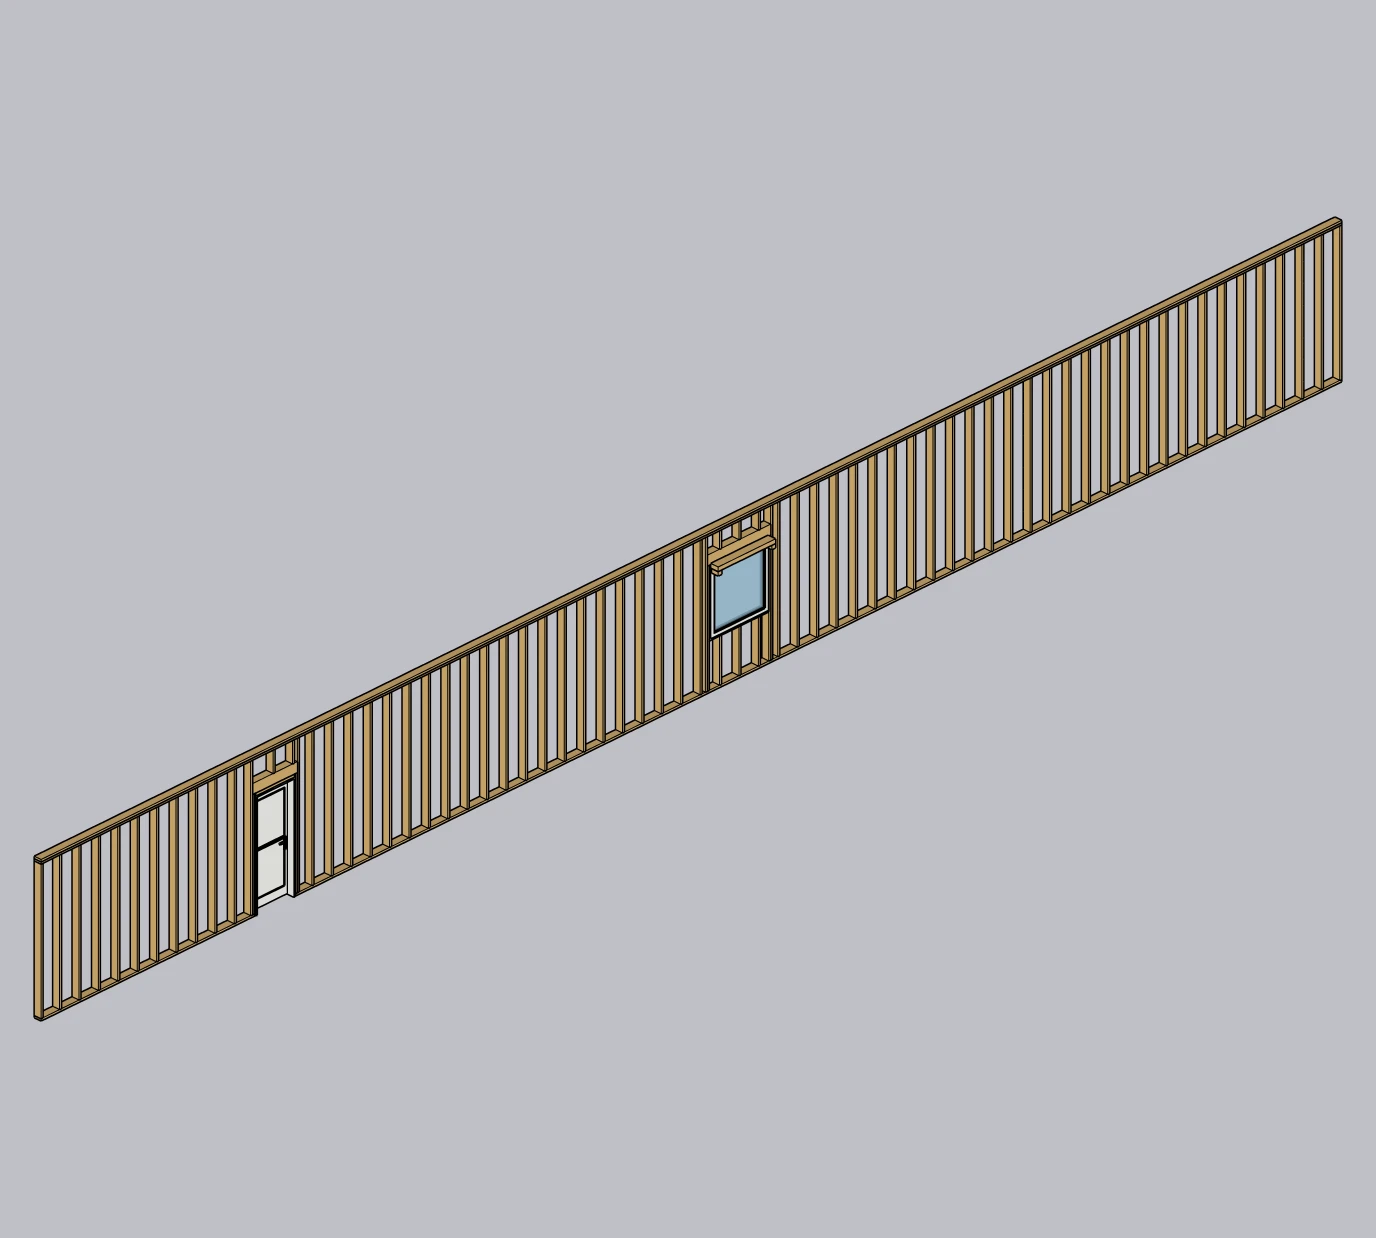
Fresh live SketchUp result: wood studs and plates around a Shaker door and fixed window. Openings are the next exercise, not an automatic part of drawing a blank wall. View full size Checkpoint: Measure wall length, base and height. Compare the structural view with the finished view; the screenshot shows the wall after its openings have been added.
Continue the exercise with the numbered door screenshots and numbered window screenshots.
A better conversation about the building
A solid wall can communicate room size. An exposed framing model lets you discuss the wall depth, window opening and roof relationship in the same view. That is useful when a homeowner needs to understand an addition or a design-build team wants to walk through an assembly before developing construction documents.
Lizark creates native SketchUp geometry organized around assembly recipes. Supported editing workflows keep model inputs available for later changes. You can use framing views for design review and finished views to communicate the architectural intent.
- Residential designers: develop framing studies alongside your home model.
- Remodelers and design-build teams: explain new work, openings and assembly depth to clients.
- Visualization teams: make structural views part of the presentation.
Start with wood walls and rough openings
Choose United States → Wood light-frame in Lizark Settings. Review the starter assembly, height, member dimensions, plate configuration and spacing, then enable and apply US framing. Supported Draw Wall, Trace Wall and Web Draw Wall workflows use the saved profile.
The wood wall system models studs and plates around rough openings. Adjust the inputs for the assembly you want to study, and add supported finished opening components when you need to show the window or door itself. Review rough-opening size, sill elevation and the opening’s host wall together.
Working from an existing floor plan? Follow the US framing tutorial to choose the profile and drawing workflow. Start with one wall and one opening so you can check alignment and wall side before extending the model.
Carry the study into floors and roofs
Wood floor options include joists, I-joists and floor trusses. Set the footprint, elevation and available member parameters for your study. Roof options include trusses and gable, shed and hip rafter workflows. Set span, length, pitch and spacing before generation.
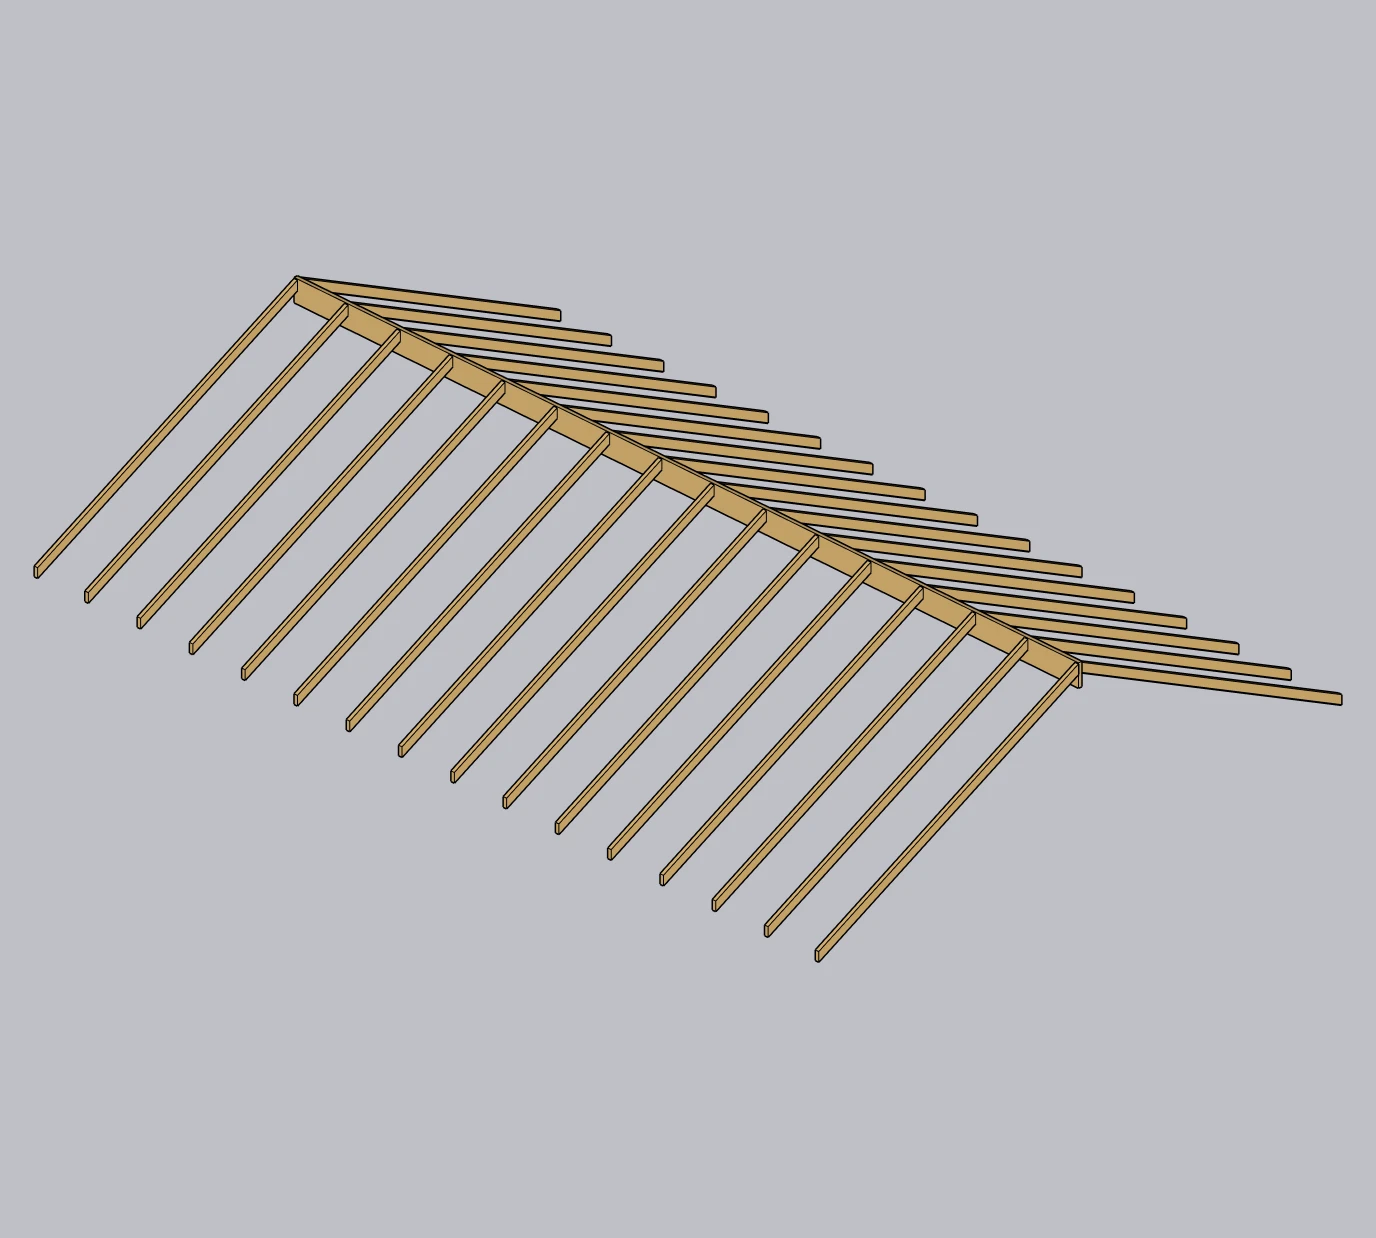
For this article, we generated a 20 ft × 30 ft gable roof with 6:12 pitch and 24 in rafter spacing. The perspective capture above shows the ridge and sloping members; the plan view below makes their repeated layout easy to inspect. These are demonstration inputs, not a recommended structural specification.
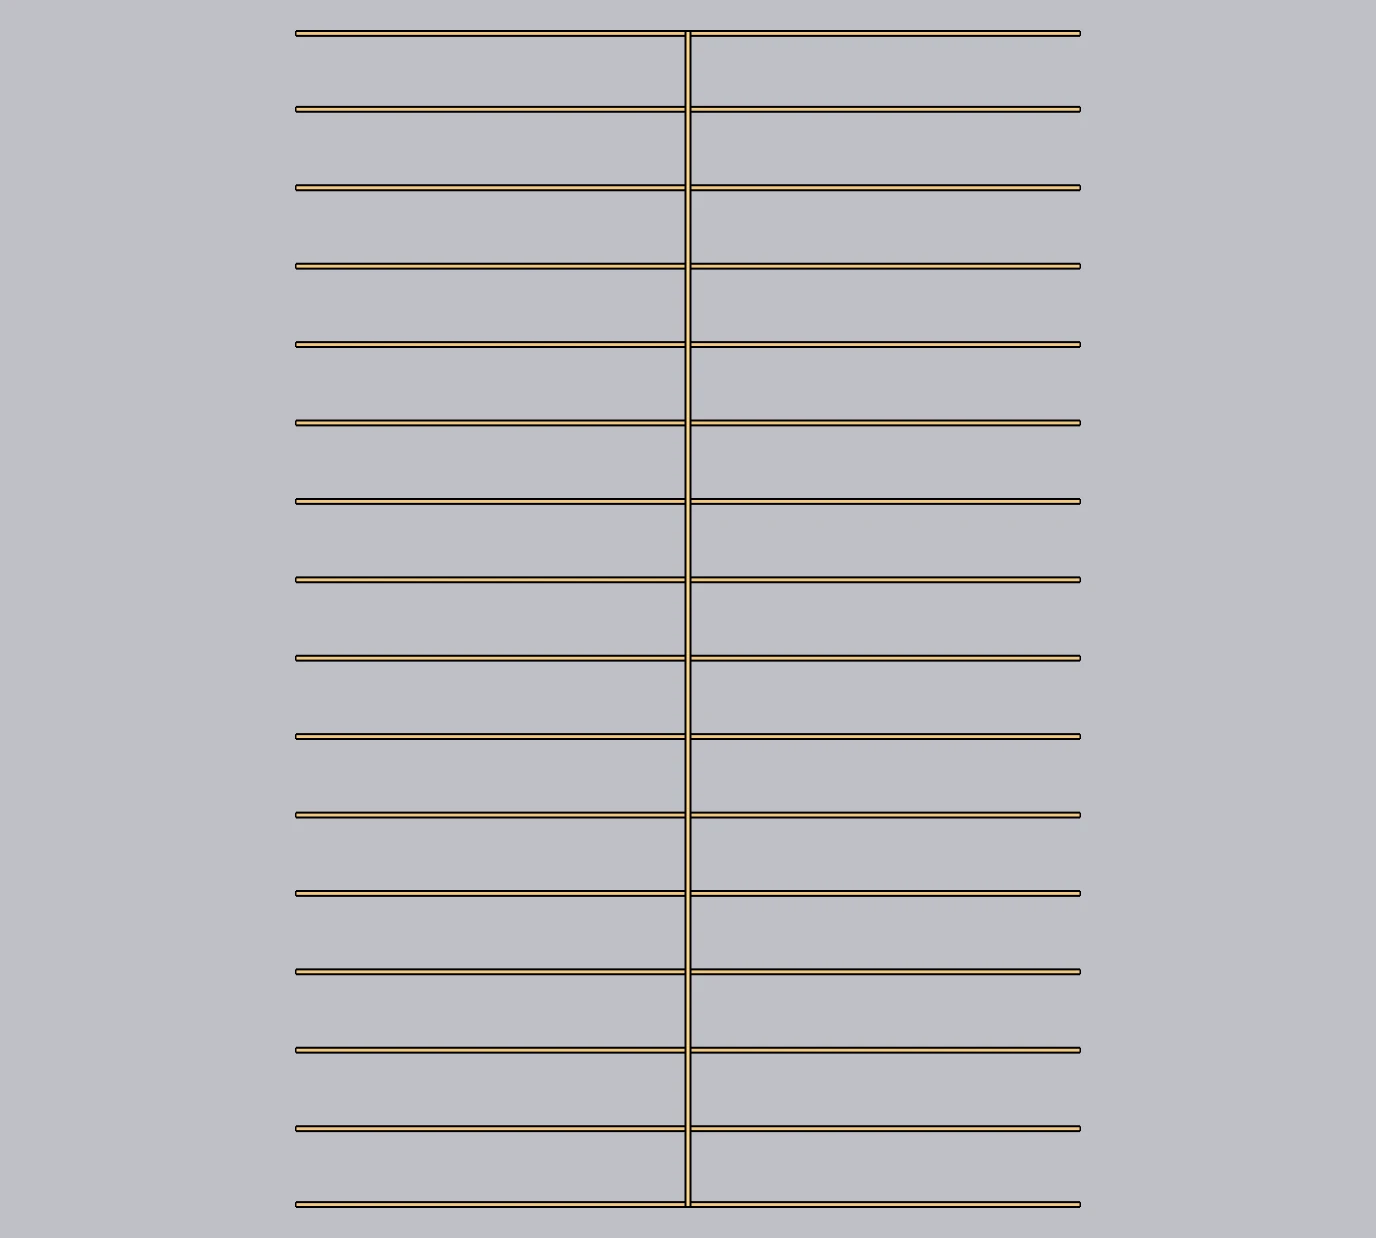
When comparing systems, select the matching profile first. CFS uses steel channels and tracks, CLT uses continuous panels, and CMU workflows use masonry modeling cores with concrete floor and roof surfaces. Explore the four-system gallery to see those differences.
Your first framing study
Try one bay before modeling the whole home
- Install and check your setup. Use the download page, then follow the installation guide and system requirements.
- Apply the US profile. Choose United States and Wood light-frame, enable US framing, review the assembly, and click Apply.
- Model one wall and opening. Use explicit units such as
20ftor240in. Check height, alignment and opening dimensions. - Add a floor or roof study. Review the footprint, elevation, span and pitch using your project inputs.
- Save the SKP. The model profile is retained when saved. Review supported edits on a project copy before making a larger batch of changes.
Get the detailed settings walkthrough in the US framing tutorial. Changing a profile affects supported new drawing; it does not convert existing assemblies.
Know what the model tells you
Lizark helps you model and communicate assemblies. Member sizes and spacing are inputs, and the presets do not calculate loads, connections, reinforcement or fire ratings. They do not certify IRC or IBC compliance. Have the project’s structural design and local requirements reviewed by the appropriate professionals before construction.
Modeled quantities can support a geometry review, but a complete estimate also needs waste allowances, specifications and current costs. Pricing databases and estimating exports remain future additions. See the roadmap for planned work.
US framing questions
Can I model US wood framing in SketchUp with Lizark?
Yes. Apply the United States wood light-frame profile in Settings, then use the supported wall, floor and roof workflows to generate editable native SketchUp geometry.
Can I enter dimensions in feet and inches?
Yes. Supported length fields accept explicit units, such as 20ft, 240in or 1ft 4in. Use consistent units and check the resulting geometry before continuing.
Does Lizark support steel, CLT and CMU too?
The US workflow includes wood light-frame, cold-formed steel, mass timber / CLT and CMU masonry systems. Apply the appropriate profile before creating new geometry; changing the profile does not convert existing assemblies.
Does the framing model certify a design for construction?
No. Lizark creates modeling geometry. Presets do not calculate loads, connections, reinforcement or fire ratings, and do not certify IRC or IBC compliance. Construction decisions need project-specific professional review.
