
US framing tutorial · Windows
Window Framing in SketchUp with Lizark
Window framing in SketchUp connects the visible window to the opening inside the wall. With Lizark, configure the window, place it on a supported US assembly, and inspect its framed opening. Review sill height and wall depth together so the elevation and interior view tell the same story.
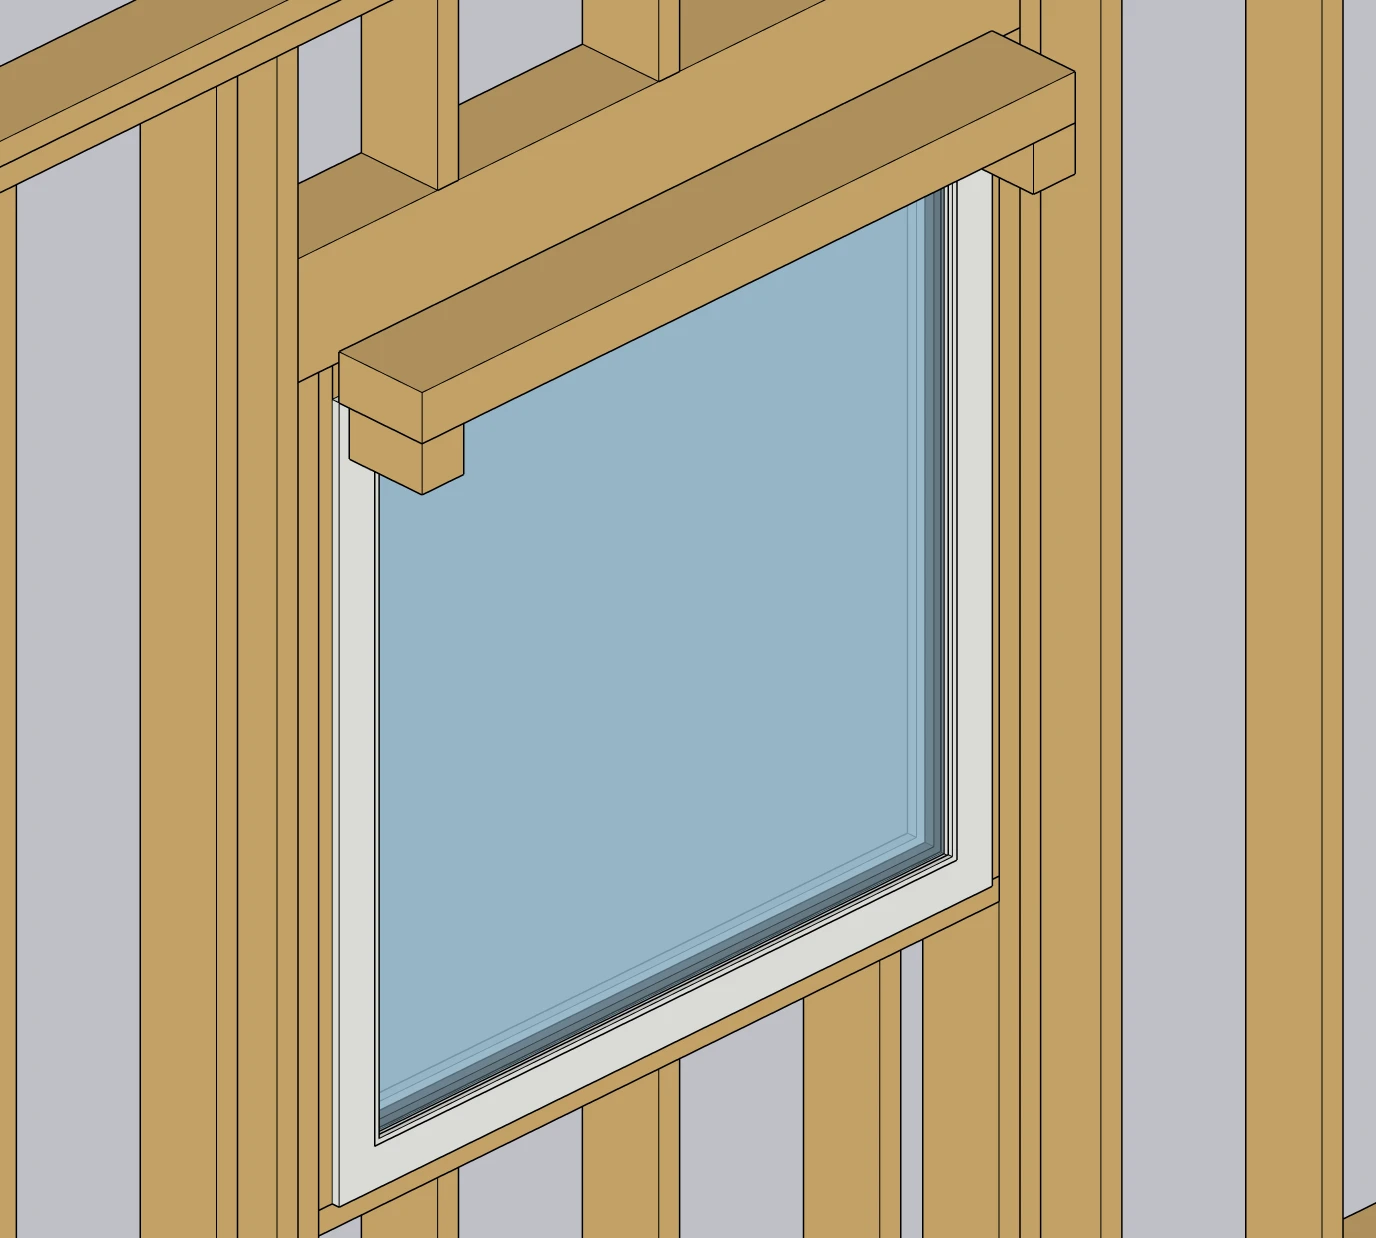
Follow along with numbered screenshots
Work in a separate practice model. These examples use Lizark 1.0.28 in SketchUp 2026. Read each action, enter the stated values, and check the result before continuing. Open any screenshot for a full-size view.
-
Step 1 · Choose the US wood profile
Open Lizark Settings → US Framing. Set Country to United States, choose Wood light-frame and check Enable US framing. For this exercise, use the 2x6 lap siding exterior assembly and a 108 in wall height. Scroll down and click Apply US framing before opening an assembly tool.
Screenshot 1 / 3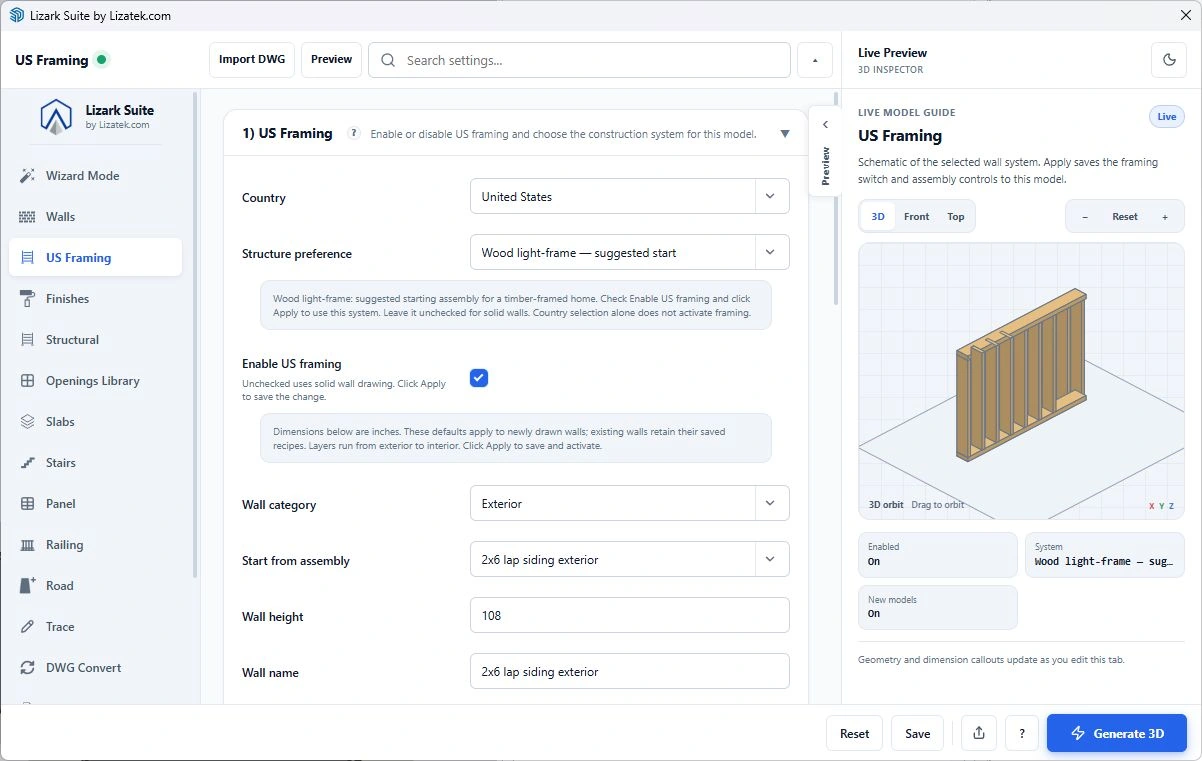
Fresh live Lizark configuration screen in SketchUp 2026. Open the image to read the controls at full size. View full size Checkpoint: The saved profile reports United States / Wood light-frame. A checked box or schematic alone does not mean the profile has been applied.
-
Step 2 · Configure the fixed window and sill
With a supported wall and its finish faces visible, open Add Window. Select Fixed, use inch units, and review Overall width, Overall height and Placement sill height. The captured example uses 47.244 in width and height with a 36 in sill. Click Create Window and pick the broad host face using single-point placement.
Example inputs for step 2 Type / units Fixed / in Overall width / height 47.244 / 47.244 Placement sill height 36 Detail level Medium Screenshot 2 / 3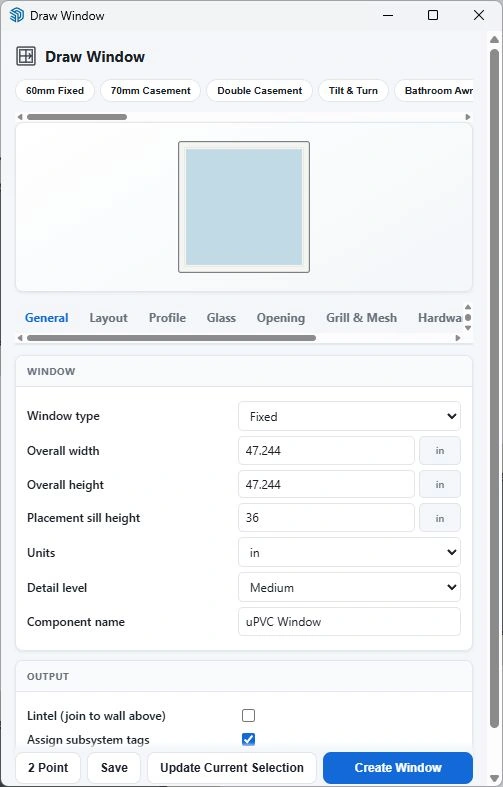
Fresh live Lizark configuration screen in SketchUp 2026. Open the image to read the controls at full size. View full size Checkpoint: Measure the sill from the intended floor reference. The separate 48 in worked example in this article explains head-height arithmetic; it is not the exact captured unit size.
-
Step 3 · Check the sill, head and wall depth
Expose the host’s structural core after placement. Look below the sill, above the head and through the complete wall thickness. Restore the finish layers and inspect both inside and outside. Use a straight elevation to compare head heights with adjacent windows.
Screenshot 3 / 3Fresh live SketchUp result: the fixed window and its framed opening, with finishes hidden for review. View full size Checkpoint: The frame and opening agree with the chosen host and sill datum; confirm installation dimensions against the selected product.
Choose the window product and opening dimensions
Fixed, casement, hung and awning windows communicate different design intentions. A picture window study may prioritize the view; an operable window study also needs the opening direction and its relationship to the room. Choose the supported window type before adjusting divisions, glazing and trim.
Manufacturers distinguish unit dimensions from rough-opening and masonry-opening dimensions. Andersen publishes separate sizing resources for these conditions. Use the intended product information rather than applying one clearance to every window family.
Coordinate sill and head elevations
Enter the window width, height and placement sill height in the chosen units. Establish whether your working elevation refers to the structural floor or finished floor, and use the same reference when discussing the opening with the project team.
For a room with several windows, compare head alignment in elevation and sill relationships inside. A repeated component can appear aligned in a perspective while one opening is on the wrong wall or story. Measure and inspect each host after placement.
Inspect framing and the finished assembly
Place the window while the broad finished wall face is visible, then switch to the structural-core view. Review the opening sides, header region, sill and short members below. Confirm the frame depth matches the assembly rather than floating in front of it.
Return to normal layers for an exterior presentation. Casing, shading and exterior projections need their own review; a modeled window opening does not specify the flashing sequence or water-management details. Link the installation documentation to the selected product in your project notes.
Worked example: coordinate sill and head heights
For an elevation study, consider a window unit 48 in high with its bottom positioned 36 in above the chosen floor datum. The simple unit-height arithmetic places its nominal top at 84 in. The frame, trim and rough-opening boundaries may use different dimensions, so label what is being measured. This arithmetic is a coordination exercise, not an egress or accessibility specification.
Place one supported fixed window in the US wall, then inspect it from outside and inside. Expose the structural core and compare the opening below the sill and above the head. Check the complete wall depth in a side view. If the room has a counter or cabinet, include it as a simple reference volume so the sill relationship can be discussed at the same time.
When adding a second window, match the intended head datum deliberately instead of copying an attractive perspective. Different unit heights may require different sill positions to produce a shared head line. Save an elevation showing both windows, then compare the actual framing openings with the selected sizing documents.
Diagnose a window that looks right in only one view
A window can appear centered from outside while its jamb is too deep or its sill is referenced to the wrong floor. Inspect the host wall, placement side and frame-depth setting first. Restore the finished wall view for placement; inspect framing after the unit has been added. Do not place on an exposed narrow stud face merely because it is visible.
If several windows have inconsistent heads, measure each unit from the same story reference. Check whether the height means the complete unit, visible glass or rough opening. If the opening is for a replacement product, distinguish an insert-window scope from a full-frame replacement scope in the project notes. The existing opening and surrounding trim can impose different constraints from a new-construction wall.
Document the opening before selecting a finish
Record product type, unit size, rough-opening information, sill datum and host assembly. Save a straight elevation alongside the perspective. For an operable window, review the direction of movement and nearby furniture as well. A window schedule should make unresolved product choices visible; a rendering should communicate the design without implying that flashing, anchorage or installation details have already been specified.
A practical Lizark workflow
- Select a supported window type and review its product dimensions.
- Set the width, height, units and placement sill height.
- Place it on the broad face of the intended US assembly wall.
- Expose the framing and inspect the opening from both sides.
- Restore finishes and compare the interior and exterior elevations.
What to check in the model
| Review | What to verify |
|---|---|
| Sizing | Unit, rough opening and masonry opening kept distinct |
| Vertical placement | Sill and head measured from a named reference |
| Frame depth | Coordinated with the complete wall assembly |
| Exterior detail | Trim and installation documentation reviewed separately |
Frequently asked questions
Is the window size the same as its rough opening?
Not necessarily. Use manufacturer sizing information for the selected series and installation condition.
Does a window model verify bedroom egress?
No. Check the actual product opening characteristics and applicable local requirements separately from the visualization.
Further reading
Product and industry references for the distinctions discussed in this guide:
